Protect APIs
API Protection and API Firewall help you protect your APIs from malicious intents. API Protection generates a protection configuration that is based on the OpenAPI definition of your API, and API Firewall enforces this configuration in runtime.
Both OpenAPI Specification v2 and v3.0 are supported.
Currently, GraphQL APIs are not supported.
For best results, before you start make sure that the OpenAPI definition of your API is valid and has a satisfactory audit score (at least 70 points). See API Security Audit.
Create a protection configuration
Tailor a protection configuration for your API based on its OpenAPI definition. Protection tokens tie protection configurations to running API Firewall instances.
- In 42Crunch Platform, click Protect. The API Protection wizard opens.
- Select the API collection and the API you want, and click Configure protection.
- If this is the first protection configuration you create for this API, enter a name for the protection token. If your API has an existing protection configuration, an existing token is used. For more details on managing protection tokens, see Create or revoke protection tokens manually.
- If needed, you can switch API Firewall to run in non-blocking mode. This is optional and should be used with caution. For more details, see API Firewall blocking level.
- Click Review setup, and verify that the details are as you want them. If you want to change something, you can click on the tabs in the API Protection wizard to jump to the correct section.
- When you are ready, click Complete setup. The protection configuration for the API and the protection token for this configuration are generated.
- Copy the token value and save it securely (for example, as a Kubernetes secret). You will need this value when you configure the API Firewall instance.
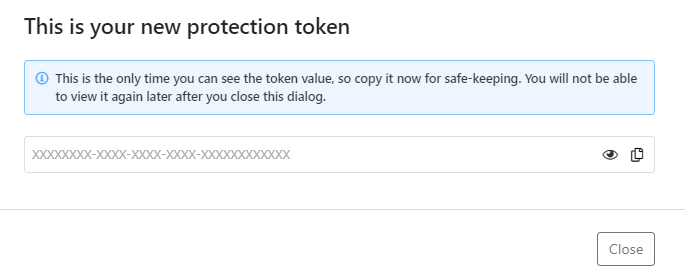
- Click Close.
Always store all your tokens securely, for example, in Kubernetes Secrets, like other secrets you use! Treat tokens as you would other sensitive information, like your passwords.
For security reasons, you cannot view the values of your existing tokens after you have created them. However, you can easily create a new one to view and copy the value.
If you reconfigure the protection configuration of an API you have previously protected, the existing protection token is not regenerated but stays the same. To change a protection token for an API, you must revoke it and create a new one manually.
If you have several APIs and several environments, it can be difficult to keep track of where each protection token is used. To stay on top of things, in addition to giving descriptive names to protection tokens, use descriptive names for your stored secrets as well, for example, in Kubernetes secrets. We recommend that you include the name of the token and the name or API UUID of the API in the name of the secret. For example, in a Kubernetes secret generic-pixi-protection-token, generic is the name entered for the token when it was created and pixi is the name of the API the token was created for.
Deploy API Firewall
42Crunch Platform provides a common base image for the API Firewall. When you combine the base image with the protection configuration you just created to deploy and run API Firewall in a container orchestrator, such as Kubernetes, you get bespoke protection for your API.
If you are new to API Firewall, we recommend you try our pre-configured sample for the Pixi API to see how deploying an API Firewall instance works.
When API Firewall starts, it establishes a two-way, HTTP/2 gRPC connection to 42Crunch Platform at the address protection.<your hostname> and the port 8001. Make sure that your network configuration (like your network firewall) authorizes these connections. API Firewall uses this connection to verify the protection token and to download the protection configuration you have created. During runtime, API Firewall uses the connection to send logs and monitoring information to the platform.
If you are an enterprise customer not accessing 42Crunch Platform at https://us.42crunch.cloud, your hostname is the same one as in your platform URL.
Try API Firewall with the sample Pixi API
Pixi API is a deliberately vulnerable, publicly available API that was created as part of the OWASP DevSlop project to demonstrate common API issues. Because the API is intentionally and predictably vulnerable, it is easy to see how API Firewall helps to cancel out the vulnerabilities.
Go to our Resources repository in GitHub to find the resources and the detailed instructions as markdown readmes for several Kubernetes environments on how to deploy the sample firewall configuration. The readme of the repository explains what kind of resources are available.
The setup has been tested on the Kubernetes engines of the following public clouds and Kubernetes environments:
- Amazon Web Services (AWS)
- Amazon Elastic Container Services (ECS) on AWS Fargate
- DigitalOcean
- IBM
- Microsoft Azure
- Minikube
Use the following guides and resources to protect the Pixi API:
- Generic Kubernetes guide: Use these resources to deploy API Firewall on a Kubernetes service in AWS, DigitalOcean, or IBM.
- Generic Kubernetes with Helm charts guide: Use these resources to deploy API Firewall on Kubernetes using Helm charts.
- Amazon ECS on AWS Fargate:
- Google Kubernetes Engine (GKE) guide: Use these resources to deploy API Firewall on GKE.
- Microsoft Azure Kubernetes Service (AKS) guide: API Firewall is available as a container image, API Firewall Container, in Azure Marketplace.
- Minikube guide: Use these resources to deploy API Firewall on Minikube.
Deploy API Firewall for your own APIs
You can replicate the sample resources provided in our Resources repository in GitHub to deploy your own APIs to your existing ecosystem. If you do not have an existing environment, see the documentation of the environment you want on how to create one.
Resources and guides for the following environments are available:
- Amazon ECS on AWS Fargate:
- Generic Kubernetes guide: Use these resources to deploy API Firewall on a Kubernetes service.
- Generic Kubernetes with Helm charts guide: Use these resources to deploy API Firewall on Kubernetes using Helm charts.
- Google Kubernetes Engine (GKE) guide: Use these resources to deploy API Firewall on GKE.
- Microsoft Azure Kubernetes Service (AKS) guide: API Firewall is available as a container image, API Firewall Container, in Azure Marketplace.
The guides use Pixi API as the example, and they start from the very beginning of importing APIs to the platform. You can skip any of the steps in the guides that you have already completed.
- Follow the instructions in the guide for your environment to make sure you are meeting all the prerequisites.
- Add the protection token you created to as the value of the protection token variable. For more details, see Protection token variable
- Configure the mandatory API-specific API Firewall variables for the API Firewall instance:
LISTEN_PORTTARGET_URLSERVER_NAMELISTEN_SSL_CERTLISTEN_SSL_KEY
By default, the listener interface of API Firewall only accepts HTTPS connections, and you must specify the variables
LISTEN_SSL_CERTandLISTEN_SSL_KEY. If you want to use HTTP connections instead, you can add the variableLISTEN_NO_TLSto your API Firewall configuration. In this case, HTTPS connections are ignored and TLS configuration is not required. For more details, see Switch API Firewall to use HTTP connections. - If you want, configure the following optional variables for the API Firewall instance:
GUARDIAN_INSTANCE_NAMEGUARDIAN_NODE_NAMEGUARDIAN_INSTANCE_NAMESPACEGUARDIAN_INSTANCE_IPGUARDIAN_INSTANCE_SERVICE_ACCOUNTPLATFORM_HOSTPRESERVE_HOSTLOG_LEVELERROR_LOG_LEVELLOG_DESTINATION
For more details and more environment variables to configure, for example, connections between the protected API and the API Firewall instance, or the API Firewall instance and your backend services, see API Firewall variables.
- Add passing TLS configuration files to the API Firewall container in your deployment scripts:
- Add the files directly to the API Firewall Docker tailored for your API. For example, you can retrieve the files from a secrets manager or generate a self-signed, temporary cert/key pair at each build and place them into the built image:
FROM 42crunch/apifirewall:v0.16.7
COPY /*.pem /opt/guardian/conf/ssl/
- Mount the images from Kubernetes secrets:
volumeMounts:
    - name: certs-volume
        mountPath: /opt/guardian/conf/vhost/ssl
        readOnly: true
...
volumes:
    - name: certs-volume
        secret:
        secretName: apifirewallcerts
 How to generate certificate/key pair for TLS configuration?
If you do not already have a certificate/key pair to use for the TLS configuration, you can create one using, for example:
- OpenSSL:
openssl req \ -newkey rsa:2048 -nodes -keyout firewall-key.pem \ -x509 -days 30 -out firewall-cert.pem - The cert-manager in Kubernetes-based environments:
apiVersion: cert-manager.io/v1alpha2 kind: Issuer metadata: name: selfsigned-issuer namespace: dev spec: selfSigned: {} - IDCA, a 42Crunch utility that generates certificates signed by a self-signed CA. Run
./idca -hfor help.
For more details, see TLS configuration.
- Add the files directly to the API Firewall Docker tailored for your API. For example, you can retrieve the files from a secrets manager or generate a self-signed, temporary cert/key pair at each build and place them into the built image:
- Run your deployment scripts to run API Firewall. The API Firewall instance starts and API Protection is activated for your API.
To invoke your API and its operations, your API consumers must now call the listener interface of the API Firewall at https://<SERVER_NAME>:<LISTEN_PORT>. All API calls go through API Firewall that filters out the unwanted calls and only lets through the calls that should be allowed based on the OpenAPI definition of your API.
When API Firewall is launched, it performs the following steps:
- Checks that the required environment variables have been defined in the configuration files.
- Retrieves protection configuration that matches the defined protection token from 42Crunch Platform.
- Starts the reverse proxy.
In the rare case that an API Firewall instance receives a configuration that is not valid and cannot be run, the instance and its Kubernetes pod immediately exit and this is logged in your Kubernetes logs. You can also see this in the details of the API, both in the API collection view and on the Protection tab of the API.
Test API Firewall
Once you have the API Firewall instance protecting your API up and running, you can send API requests to the protected API to test how the firewall works.
For our sample API, Pixi, we have included a test collection for Postman in the resources repository. This collection provides ready-made malicious calls to easily invoke the Pixi API and see the protection in action. For more details on the sample attacks, see the generic Kubernetes guide in the repository.
The sample attacks might also give you some ideas what to test on your own APIs.
What is...
API Firewall deployment architecture
Kubernetes Injector for API Firewall
Protections and security extensions
How to...
Deploy API Firewall with Kubernetes Injector
Manage API Firewall configuration
Deactivate automatic contract enforcement in API Firewall
Monitor APIs and API Firewall instances
Learn more...
How API Firewall validates API traffic
x-42c extensions for API Protection and API Firewall