Customize platform features
Customizations comprise of a list of directions to the features in 42Crunch Platform, such as API Security Audit and API Scan, on how they should behave: what to test or not, what is expected behavior in your particular circumstances, or how to consider the results. Customizations are defined as rules on the platform level, and you can create as many different rules as you need.
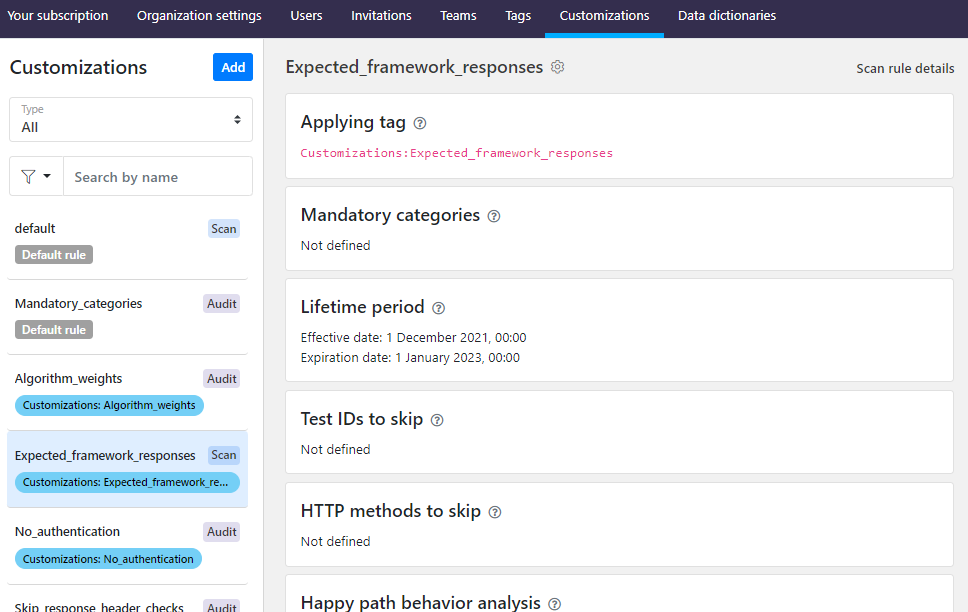
Tags are the mechanism for applying the customizations to your APIs. When you define your customizations, you also define the tags that go with those customizations. Then, to apply those customizations to your APIs, you tag each API with the tag for the customization you want. Each category:tag pair can apply only a single customization.
Default rules are applied by default to any APIs in your organization that are not tagged for a rule of the same type (audit rule or scan rule). If APIs are tagged for other other customization rules as well, the rule applied with the tag takes precedence and the default rule is completely ignored. You can see all customization rules that apply to a particular API on the API summary tab.
Create a new audit rule
You can customize how Security Audit handles your API definitions, for example, skip some checks or define a default sensitivity level for API operations and data they handle.
The x-42c extensions for customizations applied locally in API definitions override the customizations defined as audit rules on the platform level and applied with tags.
- Before you start, make sure that the category and tag you want to associate with your audit rule already exists. See Create new tags and categories.
We recommend putting customization rules in a dedicated category, so that it is easy to find the customization tags. We also recommend that you do not allow users to create tags in this category, so that organization administrators stay in control of these. You can also restrict that category so that users can only apply a single tag from it to any one API. This makes it easy to avoid adding two conflicting customization rules to an API.
- Click next to your username, and click Customizations. You can see all customization rules already in your organization.
- Do one of the following:
- To start from the baseline defined in an existing audit rule, like your default audit rule, go to the audit rule you want, and click > Copy.
- To start from scratch, click Add > Add audit rule.
- Enter a name for the rule, and select which category and tag it is associated with. You can also set the time period when the rule is in effect, if you want. When ready, click Configure audit checks.
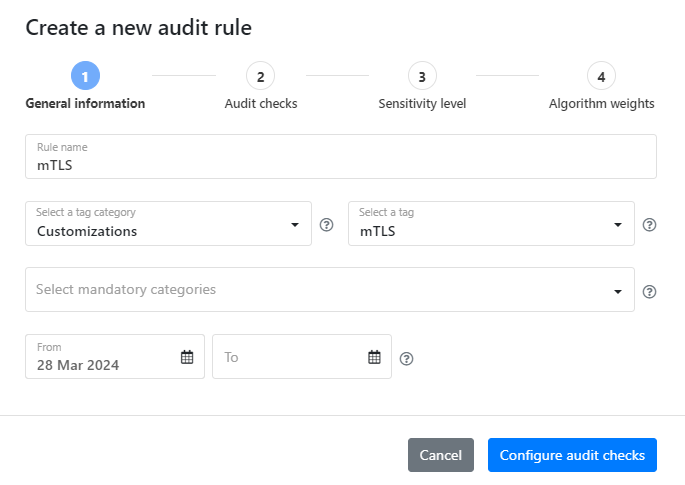
- If you want, you can change how Security Audit handles security checks by activating the setting and choosing one of the following:
- Mutual TLS is used: If your whole API uses mTLS, you can declare it in an audit rule and the API is considered fully secured. See Declare mTLS authentication.
- Accept empty security requirements: All empty security requirements in API definitions are considered to indicate that authentication is not required at all and are not flagged as errors. See Allow empty security requirements.
- Ignore authentication checks: Security Audit does not run authentication checks at all. See Run audit without authentication checks.
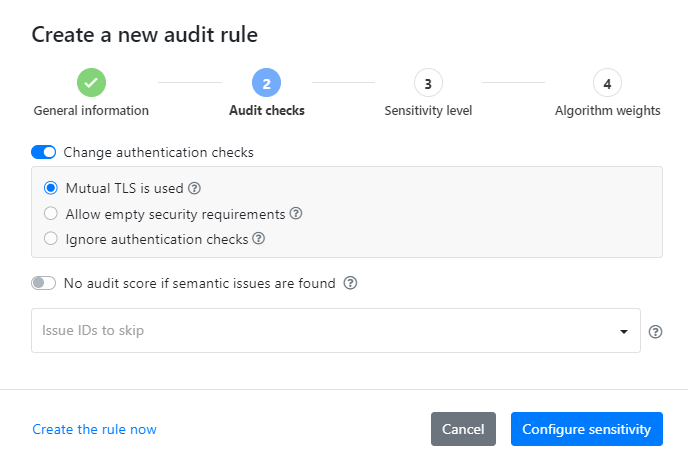
- If you want, you can stop Security Audit from providing the audit score for any APIs where it finds semantic issues, to highlight that it is not a valid OpenAPI definition. Even though semantic issues are perhaps less severe than structural issues, they still indicate that the API definition does not conform to the OpenAPI Specification (OAS) and could cause problems when using your API.
- If there are particular checks from your previous audits that you want to exclude from audit, select the issue IDs for the checks you want to skip. You can find the issue IDs from your previous audit reports, or online from API Security Encyclopedia.
You cannot skip structural (
validation-) or semantic (semantic-) issues in the audit, as these are required to make sure your OpenAPI definition is valid according to the OpenAPI Specification (OAS). - Set the level of sensitivity for API operations or data that is included in schemas or parameters (OAS v2 only). The default level is medium.
- Adjust the weights how the algorithm in Security Audit balances different elements when it calculates the audit score for your APIs.
- When you are ready, click Create audit rule.
The audit rule is added to your organization. Tagging an API in 42Crunch Platform with the category:tag pair associated with the rule applies it to that API. See Apply tags to APIs.
You do not have to customize everything with every rule, and you do not have to click through all tabs to create a rule. For example, if you only want the rule to skip some checks, you can configure them and click Create rule now to skip the rest of the options.
For more details on audit customizations, see Customizations for Security Audit.
Create a new scan rule
You can customize how API Scan behaves when scanning your API implementations with scan rules, customization configurations that API Scan uses when it scans APIs tagged with the associated category:tag pair. Scan rules are always defined on platform level, they cannot be defined locally in API definitions.
- Before you start, make sure that the category and tag you want to associate with your scan rule already exists. See Create new tags and categories.
We recommend putting customization rules in a dedicated category, so that it is easy to find the customization tags. We also recommend that you do not allow users to create tags in this category, so that organization administrators stay in control of these. You can also restrict that category so that users can only apply a single tag from it to any one API. This makes it easy to avoid adding two conflicting customization rules to an API.
- Click next to your username, and click Customizations. You can see all customization rules already in your organization.
- Do one of the following:
- To start from the baseline defined in an existing scan rule, like your default scan rule, go to the scan rule you want, and click > Copy.
- To start from scratch, click Add > Add scan rule.
- Enter a name for the rule, select which category and tag it is associated with, and set the time period when the rule is in effect.
- If there are particular tests or HTTP methods (operations) you want to exclude from the scan based on your previous scans, select the test IDs for the tests or the HTTP methods you want to skip. You can find the test IDs from your previous scan reports (see Scan report).
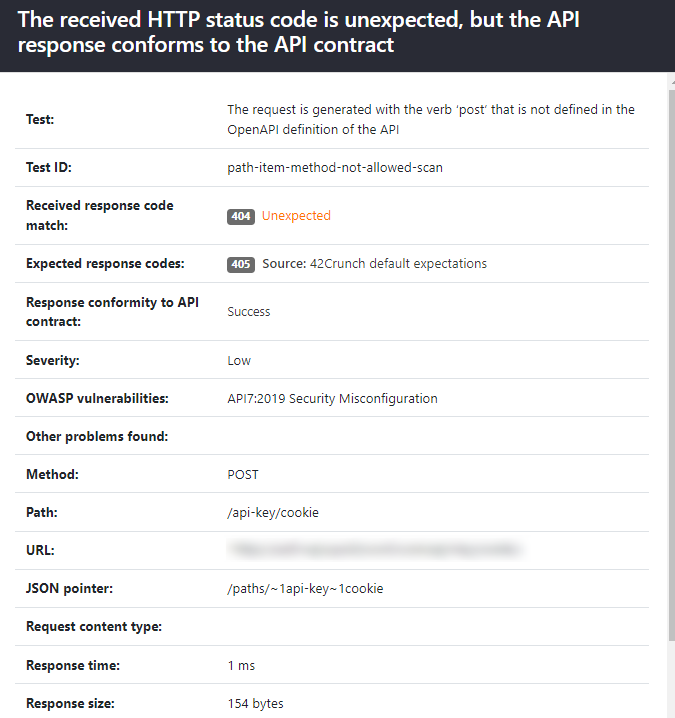
- List any HTTP status codes for failures (
4XX—5XX) or successes (1XX—3XX) in the API responses that are known to be expected for the happy path requests that the scan sends. You can also stop scan analyzing response headers or bodies in API responses to happy path requests.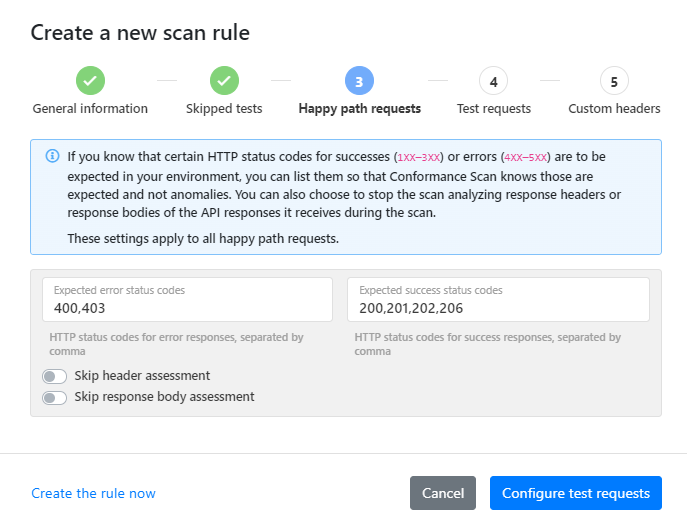
For more details on happy path requests in API Scan, see Happy path tests.
By default, the expected HTTP status response codes that are defined in scan rules applied to the scanned API take preference over the response codes that API Scan would otherwise expect. However, this can cause problems in scan process if your scan rule only skips header or response body analysis but does not define any expected response codes, either for happy path requests or for particular test IDs. This results in the scan rule to have
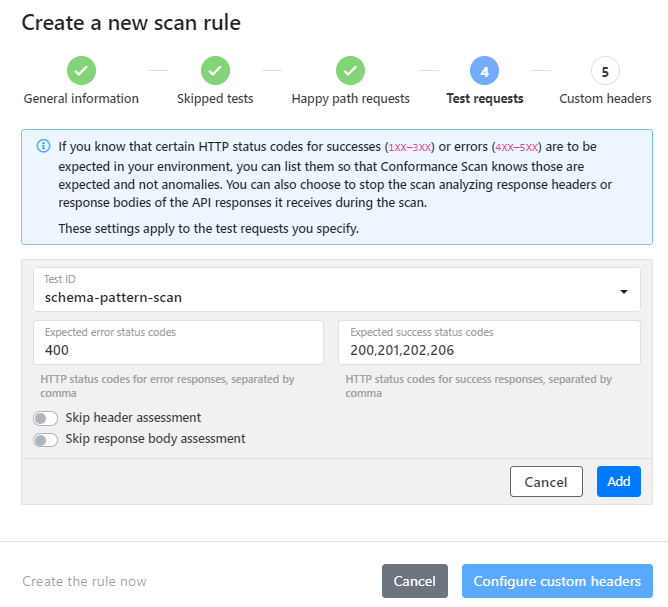
nulldefined as the expected response code, and because the scan rule takes preference over the default scan behavior, no response codes exceptnullare accepted. This in turn means that some tests are incorrectly flagged as returning unexpected response codes when they were in fact successful. - If there are particular tests where certain HTTP status codes in the API responses are known to be expected, pick the test ID you want, list the expected codes for failures and successes you want, and click Add. You can add as many test IDs to the rule as you want. You can also stop scan analyzing response headers or bodies in API responses to test requests.
For more details, see How API Scan works.
- If you want the scan to include custom headers in the requests it sends, enter the header name in Key and the header value in Value. You can define as many custom headers as you want.
Pay attention to the names of the headers. If you have duplicate header names, API Scan combines their values into an array. For example, if you had two headers called
My_header, one with the valuefooand the other with the valuebar, API Scan would treat that asMy_header:[foo, bar]. - When you are ready, click Add scan rule.
The scan rule is added to your organization. Tagging an API in 42Crunch Platform with the category:tag pair associated with the rule applies it to that API. See Apply tags to APIs.
If you are running API Scan on-premises, you must delete and reconfigure the existing scan configurations for your APIs before new scan rules take effect.
For more details on scan customizations, see Customizations for API Scan.
Update customization rules
You can update customization rules as your needs change, or if you find out a rule is not working as you want it to.
- Go to the rule you want, and click > Update.
- Edit the directives and details of the rule as needed, and click the update button.
The rule is updated and the changes to it take place immediately. Changing the category or tag of a rule does not change the tag on APIs where the rule has already been applied to: if you want to keep the rule applied, you must also update the tag applied to the API. See Apply tags to APIs.
Enforce mandatory tag categories
Depending on how you decide to use tags, you might want to enforce all APIs to have a certain kind of tag. You can enforce this through mandatory categories in customization rules. For example, you could define a category called Application to be mandatory in all your audit rules, including the default audit rule, to ensure that your APIs always denote which service or application they relate to. Defining mandatory categories in the default audit rule means that the rule is enforced even freshly imported APIs with no tags yet.
Because the default audit rule is ignored if the API is tagged for another audit rule, you should repeat your mandatory categories in all audit rules. Otherwise, they might accidentally cease to be enforced. If you create the additional rules by copying your default rule, you can be sure that all your audit rules start from the same baseline.
- Create the category you want to make mandatory, and populate it with the tags. See Create new tags and categories.
- Go to update your default audit rule.
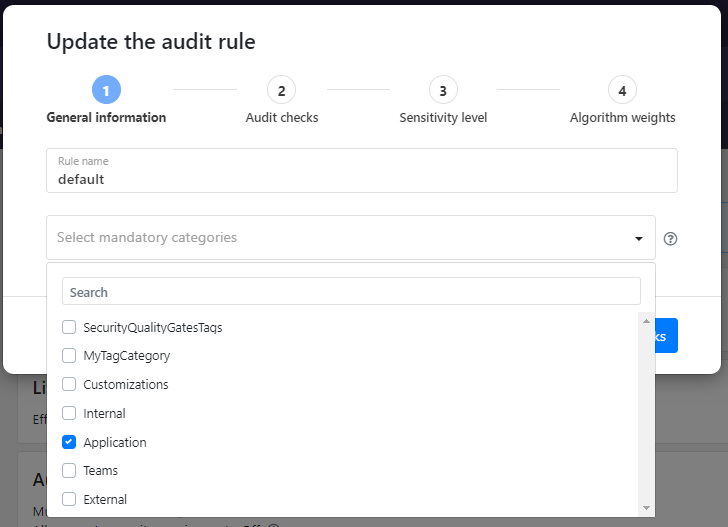
- In mandatory categories, select the categories you want to enforce. All APIs must have at least one tag from each of the listed category applied to them.
- When you are ready, click to update or create the audit rule.
When any new APIs are imported to your organization in 42Crunch Platform or the existing APIs are re-audited, Security Audit now checks the tags applied to the API and raises an issue (issue IDs validation-mandatory-category for OAS v2, v3-mandatory-category for OAS v3, and v3_1-mandatory-category for OAS v3.1) if the API is missing a tag from any of the categories you defined to be mandatory. The issue is resolved when the API is tagged with a tag from each of your mandatory categories.
If you have integrated Security Audit with your CI/CD pipeline, you can also add the issue ID as a fail-on condition for your pipeline or in your security quality gates. See the configuration examples in our Resources repository in GitHub.
Although Security Audit is the main gatekeeper by alerting on the missing mandatory categories, you can also define mandatory categories in scan rules. In this case, missing a tag from a mandatory category prevents creating a scan configuration for the API, thus blocking API Scan.
Reset a default customization rule
You cannot delete the default audit or scan rule, but you can reset it back to its default values. Just go to the default rule you want, and click > Restore defaults.
Restoring default values removes all changes from the default rule and returns it to its original state. You can then start from scratch with any customizations you still want to enforce automatically, or leave the default rule as is.
Delete a customization rule
You can delete customization rules (except the default rules) that you no longer need. Just click > Delete on the customization rule you want to remove.
Deleting a customization rule permanently removes it from 42Crunch Platform. This action cannot be undone.
Customization rules are not automatically deleted when they expire. Deleting a rule does not delete the category or tag associated with it, nor does it remove the tag from APIs where the rule has been applied.