Integrate Security Audit with SonarQube
You can integrate API Security Audit with SonarQube through the plugin REST API Static Security Testing.
Currently, the OpenAPI Specification (OAS) v3.1 and GraphQL APIs are not supported.
Create an API token for SonarQube
You must add an API token that the plugin uses to authenticate to Security Audit.
- Log in to 42Crunch Platform, and click next to your username.
- Select Tokens, and click Create new token.
- Enter a unique and descriptive name for the token, such as
Security Audit token. - Make sure the token type is API token, and in token access rights, select API Security Audit, List resources, and Delete resources.
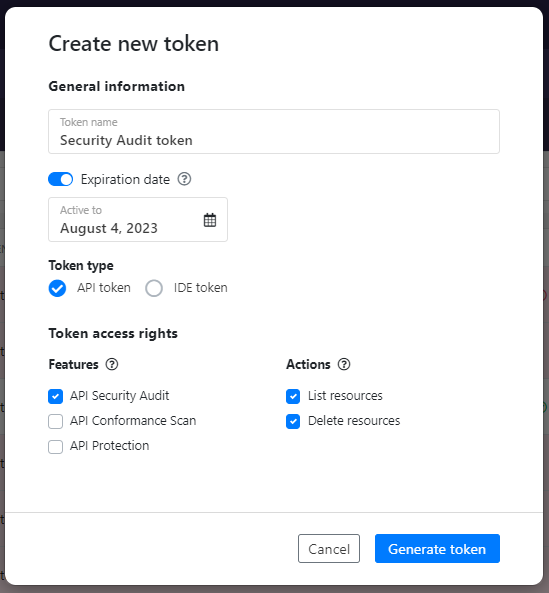
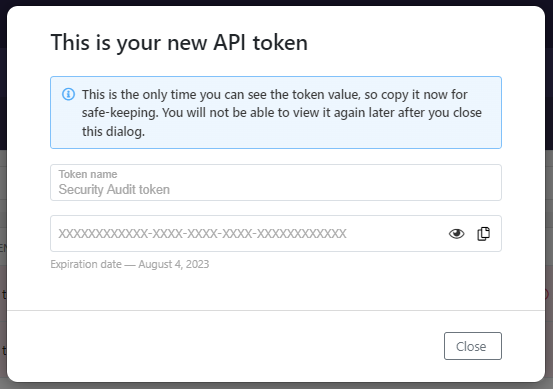
- Click Generate token.
- Copy the token value, you will need it when you configure REST API Static Security Testing.
You must have an account in 42Crunch Platform that the SonarQube plugin can use to access Security Audit. If you do not yet have an account, click here to sign up.
Add the SonarQube plugin
Before you start, make sure you have already installed SonarQube and run it at least once. For more details on SonarQube, see SonarQube documentation.
- Log in to your SonarQube account and install the plugin REST API Static Security Testing from our GitHub repository. This needs to be done only once for each server: once the plugin is installed, it is applied to all SonarQube projects on your SonarQube server.
- Restart SonarQube, and click Administration > OpenAPI. The configuration tab for the plugin opens.
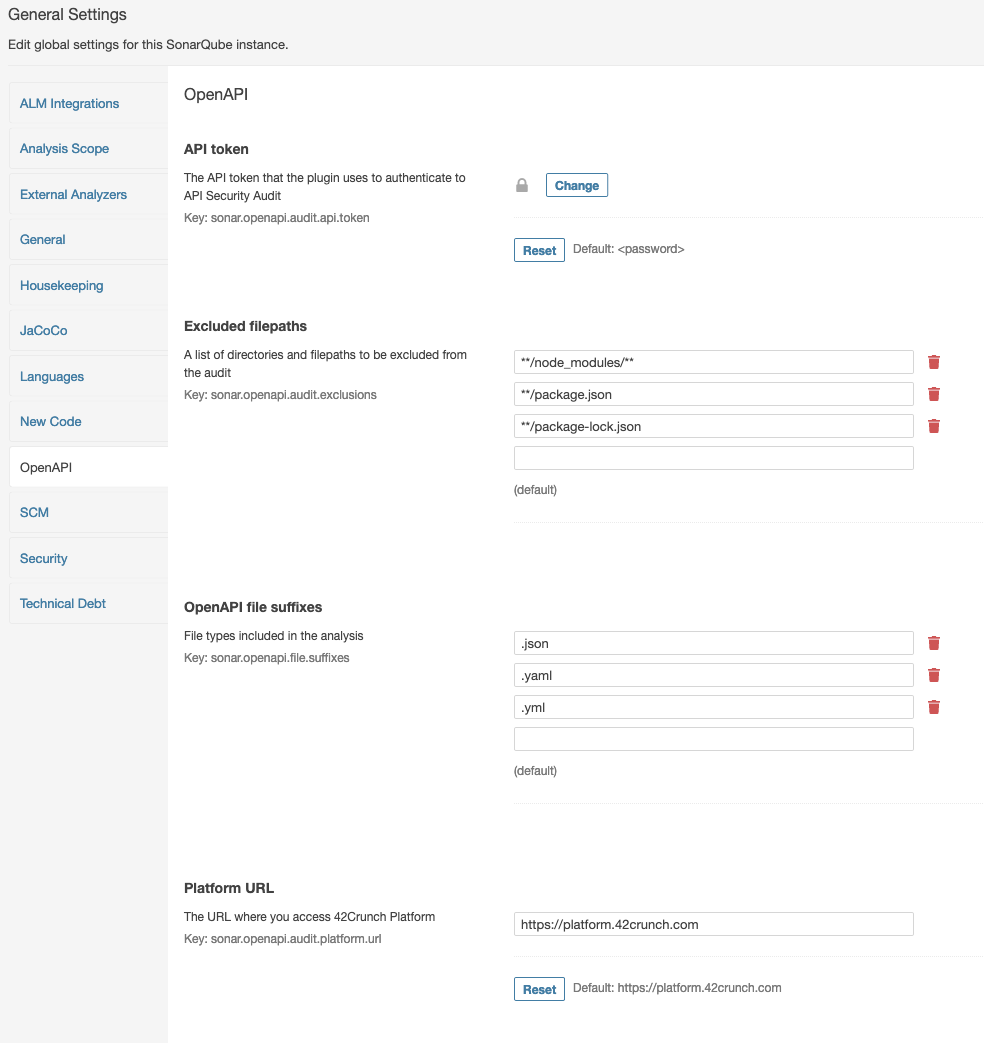
- In API token, add the value of the API token you created for the plugin, and click Save.

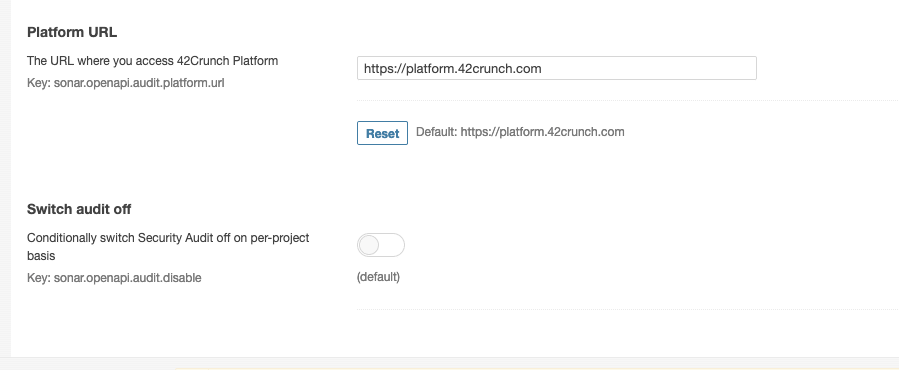
- If you are an enterprise customer not accessing 42Crunch Platform at
https://us.42crunch.cloud, enter your platform URL. This step is optional and most users do not have to do this. If you are not sure what your platform URL is, contact our support. - Go to Projects, and check that you have at least one SonarQube project. If you do not have any SonarQube projects, click , and follow the instructions to create one.
- Run SonarQube.
The REST API Static Security Testing plugin will run OpenAPI analysis on the as part of SonarQube analysis. By default, the plugin is automatically applied to each SonarQube project on the server. Click on a project to view the summary of the analysis:
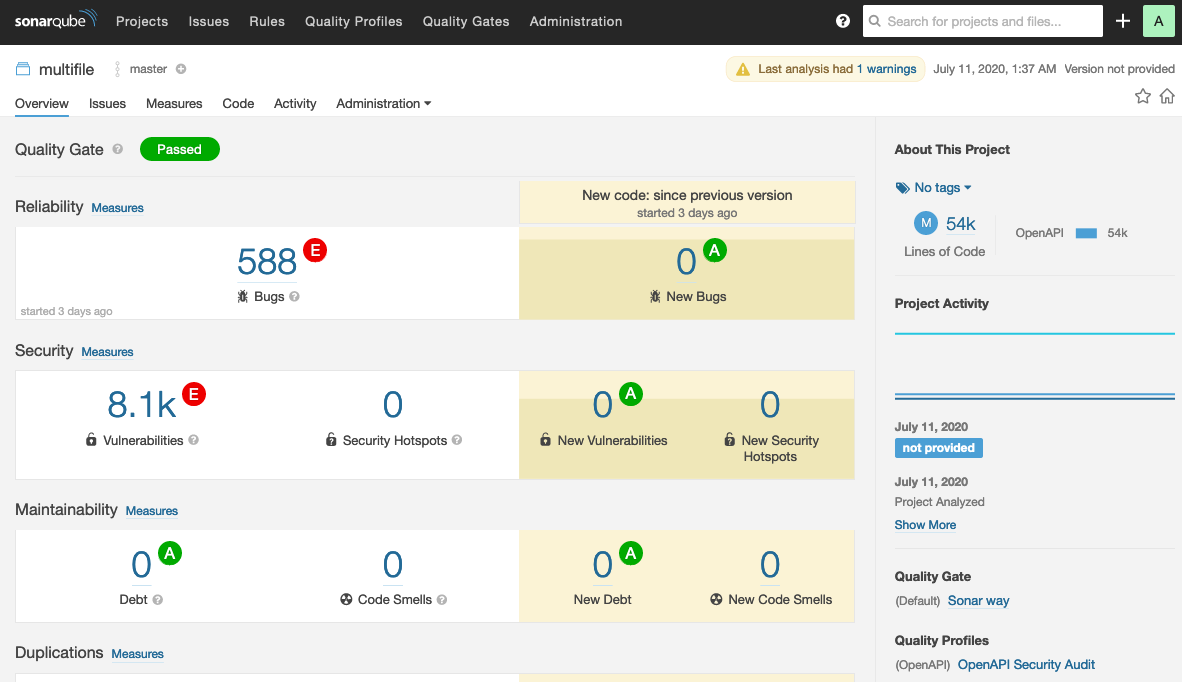
The number of issues and ratings apply to the whole SonarQube project, not individual OpenAPI files. Issues in the OpenAPI format requirements are flagged as bugs. Issues in data definition quality and security of your APIs are flagged as vulnerabilities. The Issues view gives you a more detailed report:
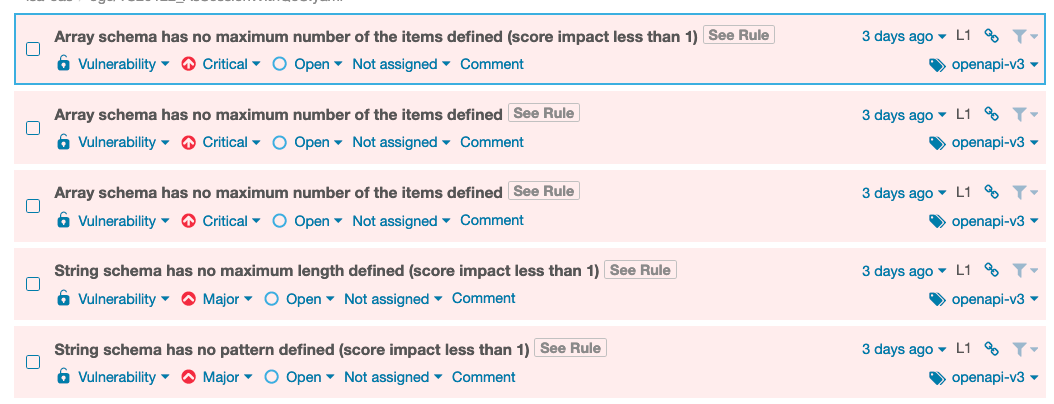
The tags on the issues show which version of the OpenAPI Specification (OAS) the issue applies to, v2 or v3. If you click See Rule (or Why is this an issue? on the newer SonarQube UI), you can view the issue details and suggested remediation for it.
Fine-tune the plugin
You can further refine how the REST API Static Security Testing plugin works.
- In SonarQube, go to Administration > OpenAPI.
- If you have plenty of JSON or YAML files that are not API definitions, you can list the directories and filepaths you want to exclude from the discovery phase in Excluded filepaths.
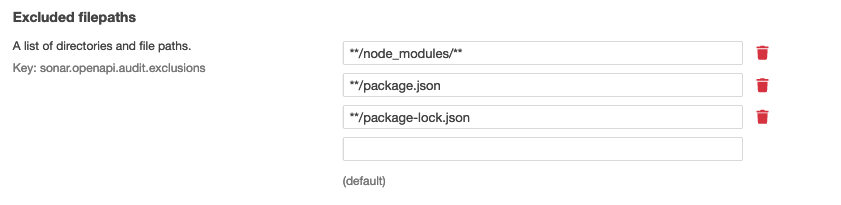
- By default, the plugin checks any
.json,.yaml, and.ymlfiles in for OpenAPI definitions. You can change which files types are checked during the discovery phase in OpenAPI file suffixes. The plugin will then only check the defined file types during the discovery. - Save your changes and re-run SonarQube.
You can see how the configuration you added changes the behavior and the results of the SonarQube analysis.
Configure custom quality gate for the plugin
You can configure a custom quality gate with specific fail-on conditions and apply it to your SonarQube project to change how the plugin works. For example, you could define a minimum score that the discovered APIs must get for the quality gate to pass.
- In SonarQube, go to Quality Gates, and click Create.
- Enter a name for your quality gate, and click Create.
- Select to apply conditions On Overall Code. The REST API Static Security Testing plugin does not differentiate between existing unchanged code and new or changed code when it runs, so you cannot apply its fail-on conditions to new code only.
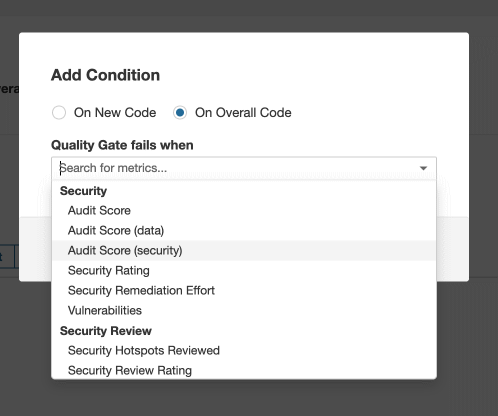
- Add the fail-on conditions that you want. The plugin offers three metrics that you can configure, all listed under Security:
- Audit Score: The total audit score of your API (max. 100 points)
- Audit Score (data): Audit score from the subcategory of data validation (max. 70/100 points)
- Audit Score (security): Audit score from the subcategory of security analysis (max. 30/100 points)
The quality gate automatically saves your changes as you make them.
- Once your custom quality gate is ready, go to the SonarQube project where you want to apply it, and click Project Settings > Quality Gate.
- Select Always use a specific Quality Gate, and select your custom quality gate.
- Save your changes and re-run SonarQube to verify them.
Stop Security Audit running on a SonarQube project
By default, when you install the REST API Static Security Testing plugin, it is applied to all SonarQube projects on your SonarQube server. However, if you have some SonarQube projects that you want to exclude from the plugin, you can switch Security Audit off in the project settings.
- Go to the SonarQube project you want, and click Project Settings > General Settings > OpenAPI.
- Switch on the setting Switch audit off.
- Save your changes and re-run SonarQube to verify them.
You can also configure other settings, such as which files to include or filepaths and directories to exclude, independently for each project as required.