Manage users, teams, and organizations
All users in 42Crunch API Security Platform can manage their own accounts from their user account settings. Organization administrators have also the Users tab where they can manage their organization and the teams in it. Organization administrators can also invite or add new users to the platform.
Organization administrators have access to view and modify, including sharing, all API collections in their organization. This means that all API collections in an organization are visible to all organization administrators like the collections were their own, both on the API collections page and in the monitoring dashboards. If an organization has several API collections, we recommend using more descriptive collection names that just organization and company name to be able to tell all collections apart.
Check your platform URL
Platform URL is the URL where you access 42Crunch Platform. For users in most organizations that is https://us.42crunch.cloud. However, enterprise customers can get a dedicated platform instance, with its own custom platform URL.
You can check you what your platform URL is on the environment tab of your organization in 42Crunch Platform. This page is available to both organization administrators and regular users.
- Click next to your username.
- Click Environment.
You can see the platform URL for the login page of your organization's instance of 42Crunch Platform, as well as which endpoints to use when configuring on-premises scan or API Firewall. You can also see the absolute maximum values for certain API Scan settings which cannot be exceeded in your instance of 42Crunch Platform.
Invite new users to your organization
As an organization administrator, you can invite new users to join your organization in 42Crunch Platform.
User invitations are switched off by default, and you cannot change the settings for invitation method yourself. If you would like to enable this feature in your organization or change its settings, contact 42Crunch support and let us know what kind of configuration (invitation mails or links, SSO or not) you would like to have.
- Click next to your username, and click Invitations.
- Click Create new invitation.
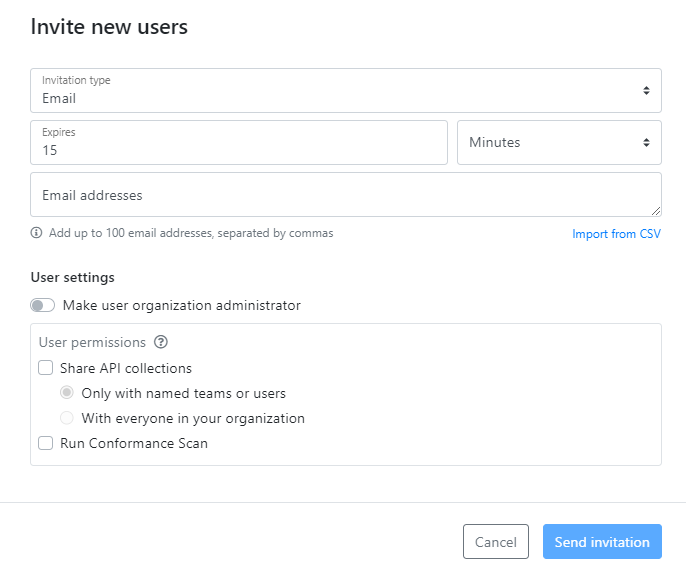
- Select the invitation type:
- Email: An invitation mail with a client token is send to the email address you enter. This is the default and more secure option.
- Link: An invitation link with a client token is generated and you can copy and share it to the user. Anyone with a valid invitation link can log in to the platform.
- If you selected email invitation, set the when the invitation expires. Invitation links always expire after 15 minutes.
- For email invitation, enter the email addresses where to send the invite. The email addresses also become the usernames of the new users in 42Crunch Platform.
- Select if you want to make new users organization administrators and which permissions you want to grant to them, and either send the invitation or generate the invitation link.
These settings apply to all recipients of the invitation. If you do not want all your users to have the same permissions or to be organization administrators, pay attention who you include in recipients. As an organization administrator, you can always manage these settings after the accounts are created.
- If you selected invitation link, copy the link from the invitation summary and share it with the user before closing the dialog.
You can see the pending email invitations on the invitation page. When an invitation is accepted and user completes the account creation, or when the invitation expires, it is removed from the list.
Add a new user
Organization administrators can also manually onboard new users to their organization in 42Crunch Platform and add user accounts for them. User accounts for the auditor role must always be added manually, they cannot be invited to join.
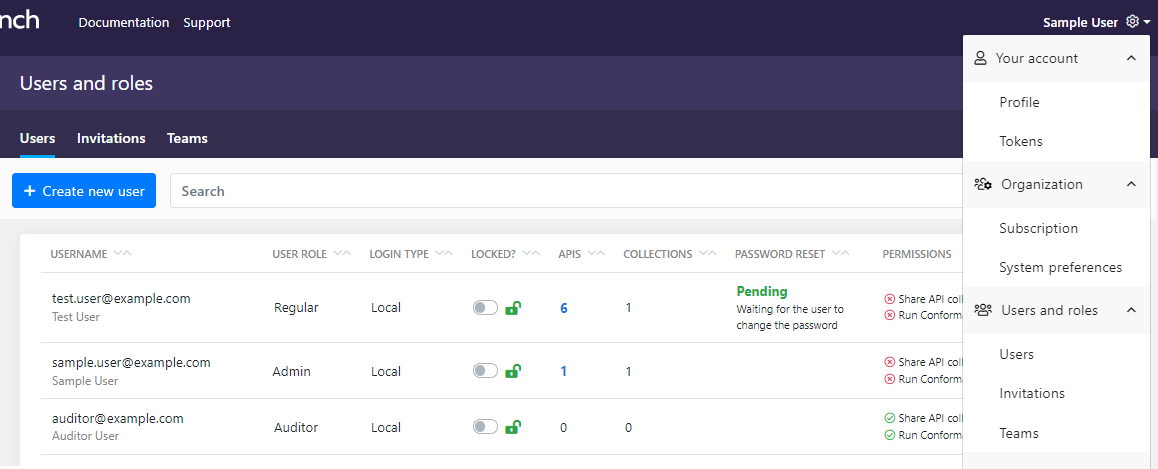
- Click next to your username, and click Users. You can see all users in your organization, including your own account.
-
To add a new user, click Create new user, fill in the required details, and click Create user. The user account is created, and a summary of the user details, including a sample message for the new user, is shown.
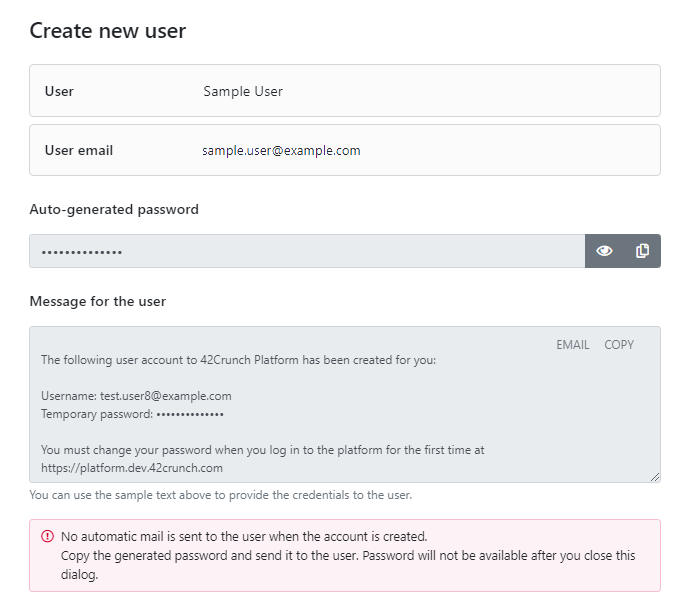
- Use the provided sample text to send the username and the temporary password to the person you created the account for.
The user sees the temporary password in cleartext in the mail, and the password must be changed on the first login. The account is flagged as pending and is not fully operational until this happens.
Manage user permissions
By default, sharing API collections, running API Scan, and managing teams are switched off on all user accounts. You can control which users in your organization have the permission to use these features.
Auditors cannot receive any permissions.
- Find the user you want. You can search the users, for example, by name or by the permissions they already have:
+scan: Users that can run API Scan-scan: Users that cannot run API Scan+share: Users that can share API collections-share: Users that cannot share API collections
- In the Permissions column, click on the permissions.
- Edit the permissions as needed, and click Update.
Change user roles
You can change the role a user has in 42Crunch Platform, for example, to promote new organization administrators or auditors.
- Find the user you want, and click > Update permissions.
- Select the new user role from the dropdown list.
- Check that the user permissions are what you want to grant to the user. Different roles have different default permissions.
Auditors cannot receive any permissions.
- When ready, click Update.
Lock a user account
If a user account is compromised and shows abnormal or harmful activity, you can lock the account out of the platform. Just switch on the setting in the Locked? column for the account you want to lock. The account is locked, and the user cannot access the platform. The APIs and API collections the user has are not affected and continue to be usable.
Switching the setting off unlocks the account and the user can again access the platform.
Force password reset
You can force users to change their passwords, for example, if you suspect that credentials have been compromised.
- Find the user whose password you want to reset.
- Click > Force password reset.
The user is logged out of the platform and the password is reset. The user must change the password upon next login to the platform.
Delete a user account
You can delete user accounts from your organization, for example, if a user leaves your company.
Deleting a user account permanently removes it from 42Crunch Platform. This action cannot be undone.
- Find the user who you want to remove from your organization in 42Crunch Platform.
- Click > Delete user.
- If the user account has assets, such as APIs and API collections, tags and tag categories, customization rules or security quality gates (SQGs), select a new owner for them. If the user was a team lead in any teams, those roles are also transferred to the selected new owner.
The new owner must be an organization administrator. If you want to check which particular APIs and API collections a user owns and change the owner individually, you can click on the number of APIs that the user has.
- Click Delete user
The user account is removed from 42Crunch Platform, and any assets related to that account are transferred over to the new owner you selected.
Add a new team to your organization
Users in an organization are grouped into teams. By default, each organization always has a team that includes everyone in that organization. In addition, organization administrators (or users they have granted the permission to manage teams, see Manage user permissions) can create additional teams for specific groups of users.
You cannot modify the default team that includes everyone in your organization in any way.
- Click next to your username, and click Teams.
- Click Create team.
- Enter a name for the team and select a team leader for it.
- Select the rest of the users you want to add to the team.
- Click Create team.
The new team is added to your organization. API collections can now be shared at one go with all users you added to the team.

You can manage teams in your organization, such as add or remove users, rename a team, or change a team leader, on the Teams tab. You can also remove teams that are no longer needed.
Removing a team from the organization does not delete the user accounts of the team members, but it does remove their access to API collections shared with that specific team. Because a team must always have a team leader, team leaders cannot be removed from their teams. You must first set another user as the team leader.
View platform audit logs
You can view platform audit logs to drill down to the activity in your organization, for example, to troubleshoot an issue. For security reasons, regular users cannot view platform audit logs.
- Click next to your username, and click Platform audit logs. You can see all events in your organization over the past hour, and you can click the presets to change the time window.
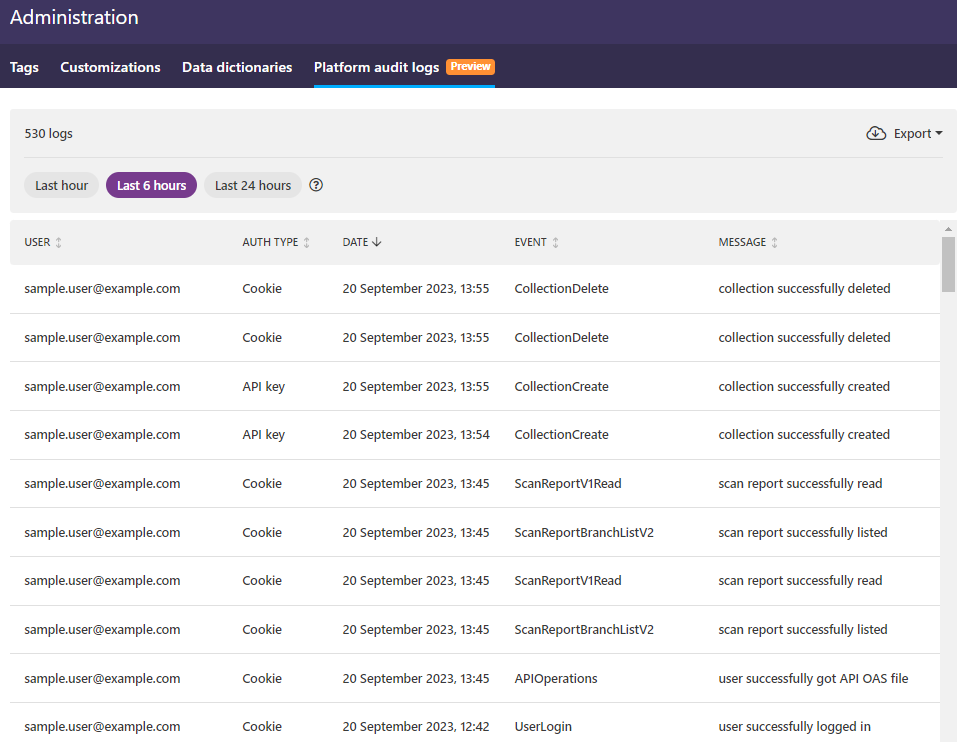
Currently, only the events from the last 24 hours are visible on the UI. This will be improved on in a later release.
- To view more details of a particular event, click the event you want. You can see, for example:
- The userID
- The used authentication type
- The action that took place
- Timestamps for when the action started and ended
- The called path
- The session ID
- The UUID of the called resource
- To export all audit logs as a JSON file, click Export > Save as JSON.
Change your subscription plan
You can also manage the subscription plan you are on. The plan determines how many users, APIs, or active API Firewall instances you can have.
- Click next to your username, and click Subscription.
- Click the email button to open your email client, or copy the email address and manually paste it to a new email.
- Provide additional details for your subscription, for example, the billing details for invoicing, and send the mail.
Our sales team processes your requests and contacts you.
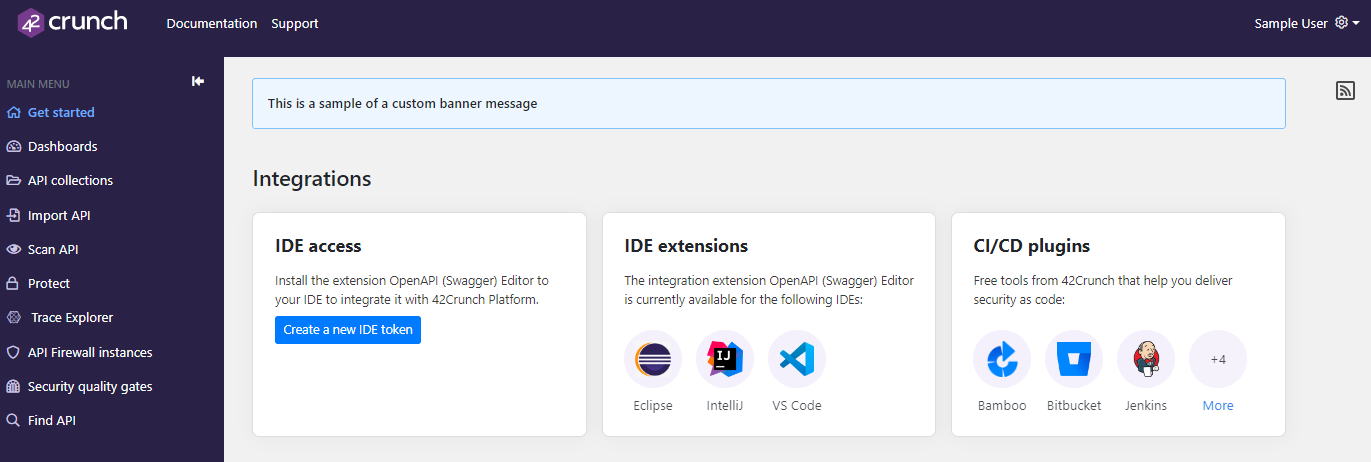
Add a message banner on the landing page
You can add a custom message banner that is visible to all users in your organization on the landing page of 42Crunch Platform.
- Click next to your username, and click System preferences.
- In Get started page banner message, enter the text that you want to display in the banner.
The banner text cannot be longer than 255 characters. You can preview how the banner looks right next to the text field.
Any included URLs are rendered as active links. Depending on the target of your link, you may not need to include the full URL to get a working link: for most known domains, the links are correctly converted even if you do not include, for example, the
https://orhttps://www.in the beginning of the URL. - To change the color of your banner, select the predefined style you want to use from the style list. The preview on the right changes to reflect your selected style.
- When ready, click Apply. The banner is now visible to all users on the platform landing page.
- If you want to edit the banner later, you can simply make the required changes and click Apply.
- To remove the banner from the landing page, click Clear > Apply.
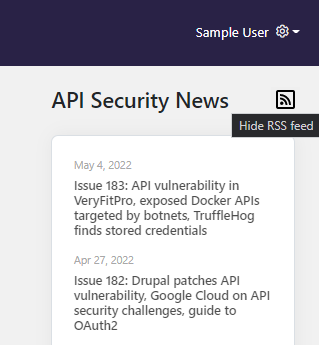
Manage the RSS feed
The landing page of 42Crunch Platform provides an RSS feed that shows news from APIsecurity.io, but organization administrators can switch it off.
- Click next to your username, and click System preferences.
- Use the toggle to switch the RSS feed off or back on.
All users can choose to show or hide the RSS feed on the landing page by clicking the RSS icon. Hiding the RSS feed does not remove it.
Switch off scan configuration web editor for regular users
If there is a need to do so, organization administrators can restrict editing scan configurations on the platform UI.
- Click next to your username, and click System preferences.
- Under API Scan, use the toggle to switch the scan configuration editor off or back on.
If you switch the scan configuration editor off:
- The web editor tab still looks the same and all users can still view scan configurations there.
- Regular user cannot make any changes to scan configurations on that tab on the platform UI and the save button is inactive.
- Regular users can still modify scan configurations by other means, such as by using the other scan configuration tabs on the platform UI.
- Organization administrators are not affected in any way.
Block Scan v1 from regular users
To facilitate migration from the legacy Scan v1engine to using the Scan v2 engine, organizations administrators can block regular user in their organization from running API Scan using scan v1 configurations.
- Click next to your username, and click System preferences.
- Under API Scan, use the toggle to switch the Scan v1 blocker on.
If you switch the Scan v1 blocker on:
- Regular users with permission to run scan can run Scan v2 engine both in the platform or on premises.
- Regular user cannot view existing Scan v1 configurations or create new ones, so they have no access to scan tokens required for running the scan.
- Regular users cannot view existing Scan v1 reports .
- Organization administrators are not affected in any way and can continue to work with both scan engines as before.